Friday, December 21, 2012

I'm a chair addict.. I admit it.

I have little red ones...

large red ones...

Vintage red ones...

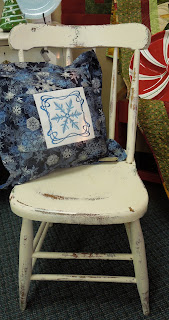
White farm house ones....

Early American ones....

Overly Loved ones...

Unbelievably Elegant ones...

Fancy yet refined ones...

Slightly hidden ones...

Hanging ones...


Waiting for a makeover ones...

And my favorite kind... miniature ones.

That's it... I'm an addict. I guess there's a meeting out there for people like me. I also have an addiction when it comes to vintage/antique lamps and any kind of small side tables. Now that my secret is out, I feel so much better.

Sunday, December 16, 2012

Experimenting with Hemp Oil

 The phrase "From Trash to Treasure" could be used in the case of this old farm chair. I use the word character a lot when describing many of the older pieces we re-do. When I looked at this chair, I saw just that. The fact that it had been worn down that much made me want to restore it even more. It took a good deal of wood glue, clamps and a couple taps with the hammer to get it back in shape.
The next step was to choose which color of Milk Paint to do it in. This chair was being painted during a demo - as an example of how Milk Paint reacts without bonding agent. I decided to use Lucketts Green. It's a soft shade and since I have a plan for this chair, I wanted it to be subtle.


This is the first coat. I want a washed look and am hoping for the chipping and flaking. It's possible I won't get that effect because the chair is so old and was exposed to the elements so no finish is left on it. The paint is apt to just be absorbed into the wood and not distress itself.

This is after the second coat. All of a sudden, there it was. The paint just started to lift off and it was as I hoped.

Not alot of distressing happened to the carved area. Not a problem, I just ran a piece of sandpaper over it and lightly distressed it.

The seat, rungs and legs bubbled up just slightly. A quick once over with a putty knife and all the flakes fell off.

I hadn't tried the Hemp Oil on the fresh paint, I always waxed it or used a varithane. Well, I got a soft rag and started rubbing the oil into the paint. It was absorsbed immediately. You could see the way the paint just went from a chalky texture to a smooth, firm finish. At this point you could still feel the oil. Two hours later, it had totally absorbed into the wood and when I ran a clean cloth over it - nothing came off. Another coat and it will be ready to go out on someones porch or even in a garden. That was my vision when I was painting it.

Wednesday, December 12, 2012

The completion of a Nostalgic piece


My vanity is complete. Now to find a mirror to embellish it and then on to the companion piece.

A completed close up of the wonderful trim after the distressing and gilding.

1930's.... prohibition, The Savoy Dance Club,  Art Deco Furniture, Elegant clothing and Gangsters.  My favorite era to read about and now I have had the privilege of enjoying the Nostalgic feel of the furniture.

I hope you enjoyed watching what I felt was a very complimentary transformation to this wonderful piece of history.

Tuesday, December 11, 2012

Spending a few minutes at the shop

How's everyone doing? I would have written sooner but I've been really busy. Since I'm not little any more, I'm responsible for guarding the house while my parents are at work. It's pretty easy work and I get to sleep on the job.

I was at the shop tonight for a few minutes. Mom went to put a coat of paint on her project. I don't get to the shop much, they say I'm a distraction. Not sure what that means but evidently it must be like naughty.

Anyway, I just wanted to let you know that I'm doing really well and miss you all. Maybe I'll see you sometime if I get to the shop.  Have a wonderful Holiday Season, be happy and healthy.
Love,  Quahog

Continuing on my project

 This is a continuation of my 1930's transformation. I want to show you the before pictures and the same pieces as they receive a makeover and second life.
 These are custom shades. With an idea of colors in mind,  I took  several MMS Milk Paints and mixed them. The body of the vanity is a combination of 90% Ironstone and 10% Shutter Gray. The trim, hardware and main drawer are 90% Typewriter and 10% Shutter Gray. By combining the colors I achieved soft subtle shades that were very popular in the 1930's. (this photo is before I used the antiquing wax so it's still very light)
 The hardware was originally gold and from years of use the metal base was showing on most of the pulls. I painted over it with the Typewriter/Shutter Gray combo, and then distressed with sandpaper, waxed it with the Antiquing Wax and added a touch of silver gilding wax.
 This is the photo of the first coat of paint
 This is the finished look. Notice how the silver over the distressing gives it a vintage look. You can also see the color the drawers and body will be when waxed.  The antiquing wax deepens the color.

 This is the before photo of the wonderful carved trim. I wanted to keep it simple, they're already ornate enough.
 This is the first coat of the charcoal color. I still have to distress and add the gilding wax.
 A finished photo of the trim on the main drawer. You can see how it was painted, distressed and then the gilding wax was added. Just a touch of glitz.

 The main drawer is totally done in charcoal. I thought it would be really boring to have it all light.
Tomorrow I will put on the final coats of paint, distress and add all the gilding. Really looking forward to sharing the finished piece. Then to start the chest that matches it. It's going to be a wonderfully romantic and nostalgic set.

Till then, be creative.
Patti

Sunday, December 9, 2012

1930's Art Deco Vanity and Chest

Today, I started working on our 1930's Art Deco Vanity. We've had it for awhile but until this morning had no idea of how I would paint it. I had several combinations in mind but when it came to actually taking the first step, I stalled out.  It's not just the vanity, there's also a matching chest of drawers.

It has a lot of scrapes and the finish is missing in several areas. One thing for sure, the detailing is fantastic and fortunately, has not been damaged.

The handles are very unique. After all these years, the finish has been rubbed off the metal in spots but all the centers are intact. They seem to be made of  a composite of some kind.

You can see from this photo the worn spots on the trim. If you were in your 80's, you'd have a little noticeable wear as well.

 My plan is to do it in a very light grey with charcoal trim. Finishing with a few coats of dark wax. The end result will blend and soften the entire look and highlight the carvings and moldings. I have the first coat on the vanity, and drawers. I'm painting the handles in the charcoal and may add a little gold wax for a hint of the gilded look from the 30's.

Give me a few days and I'll post my progress.

Keep warm and safe in this crazy weather.
Patti

Friday, December 7, 2012

A beautiful combination.

 Since July, I bet we've painted at least 200 different pieces. We've done everything from bread boxes, coffee tables, candlesticks, headboards - you name it, I think we've transformed it.

  When the pieces come in the backdoor, we clean them up and then sit back and decide what color and look we think will work the best for each one. This is a photo of a wonderful dresser that just arrived on our dock last week. Some pieces take a little thought and then there's the ones like this, that you just know the potential they have. 

You can't see from this photo but it had some deep chips and scratches. Nothing that would take away from a successful makeover - just the opposite, it gave it the vintage character it deserved.

 We wanted to use the Milk Paint on it, and decided to let it do it's own distressing. Nancy chose the colors, French Enamel and Grain Sack. What a beautiful combination. The drawer fronts and top we did in the Grain Sack, the photo with the carved medallion shows the light washed look and the easy distressing.
 The French Enamel was applied to the trim and sides. I was so afraid it would over distress itself. When you let it do it's thing you never know what you'll end up with. Needless to say, I am so excited at how it turned out. Very subtle chipping and flaking.
 The hardware was unique, I ran a piece of sandpaper over it to lightly clean it up. The detail really popped.
 As you can see from this side view, soft distressing and a wonderful vintage feel. To finish it off, I applied two coats of clear wax mixed with a touch of antiquing wax. The finish is a natural looking patina. 

And the winner is.....
 Miss Mustard Seed
  French Enamel and Grain Sack.